Digital Recording Introduction
Section 1: Basic Terms
Section 2: Getting Digital
Section 3: D.A.W – Digital Audio Workstations
Section 4: Hardware – The Audio Interface
Section 5: Introducing REAPER
Section 6: Recording with Reaper
Section 6: Mixing with automation
Section 7: Effects
Section 8: Rendering
Trouble Shooting
BASIC TERMS
Mechanical Recording
Audio is produced by the air being alternately compressed and released by something vibrating or moving. The first recordings were made by taking this motion and using it to move a needle that was placed over a rotating wax cylinder. The needle’s motions made grooves in the wax.
In order to play the recording, the needle was placed in the wax groove and it’s motion was directed to a large horn that amplified the sound. No electricity was needed, as the cylinders rotation was spring powered. The early audio recordings were mono only, a single audio channel.

Vinyl Records eliminated the cylinder, and AC power eliminated the spring and added an amplifier for louder sound.

Copies were made by making physical casts of the recording and pressing it onto warm vinyl.


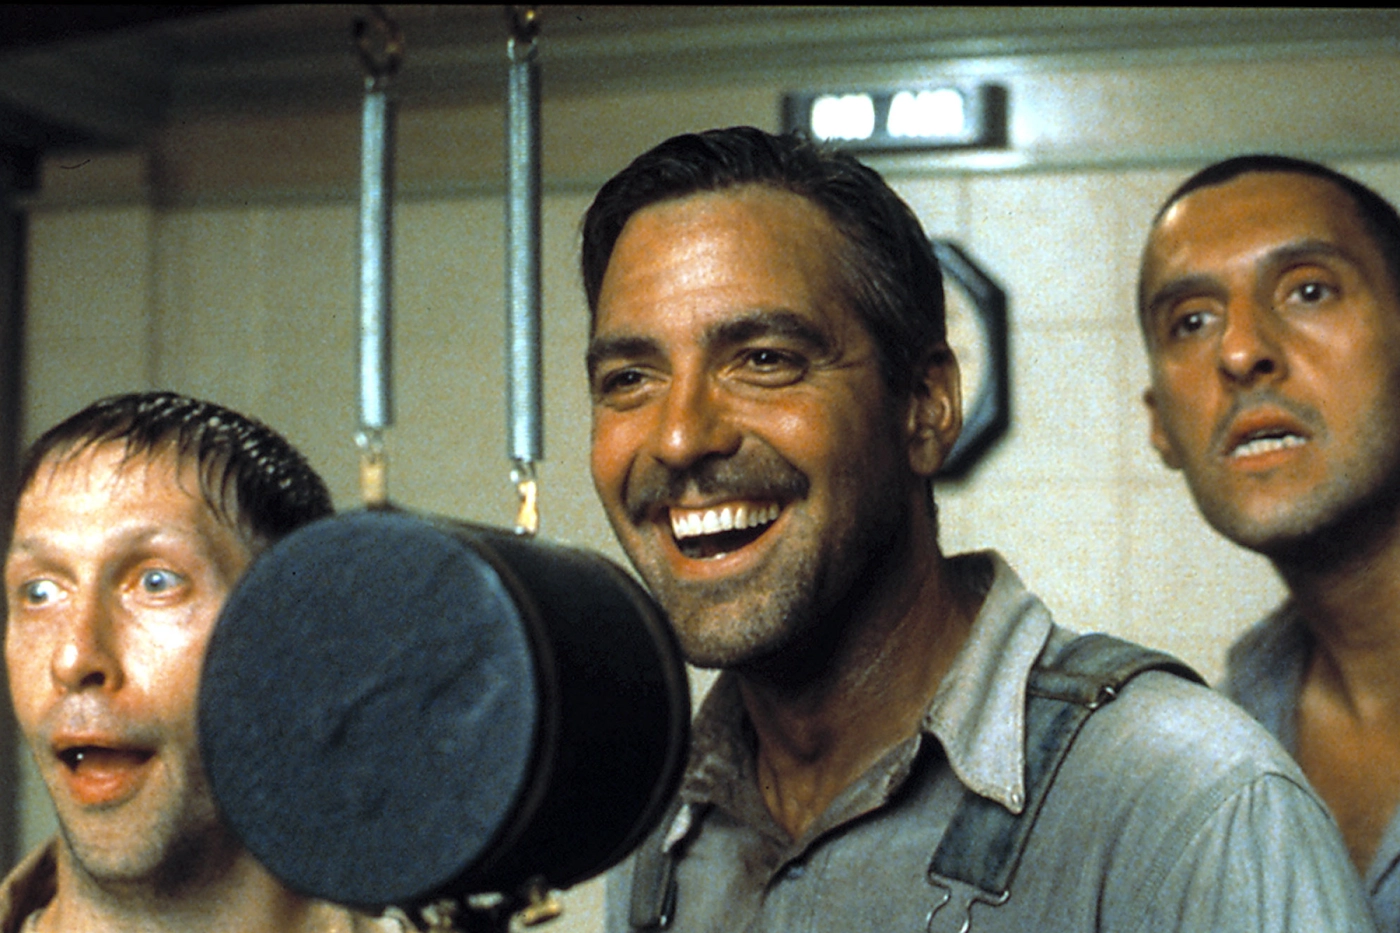
Single microphones were used at first, and the audio was often recorded directly to vinyl recording as seen in the movie “O Brother, Where Art Thou?”
Multiple microphones allowed an audio engineer to control the volume of the various instruments or voices during a performance.

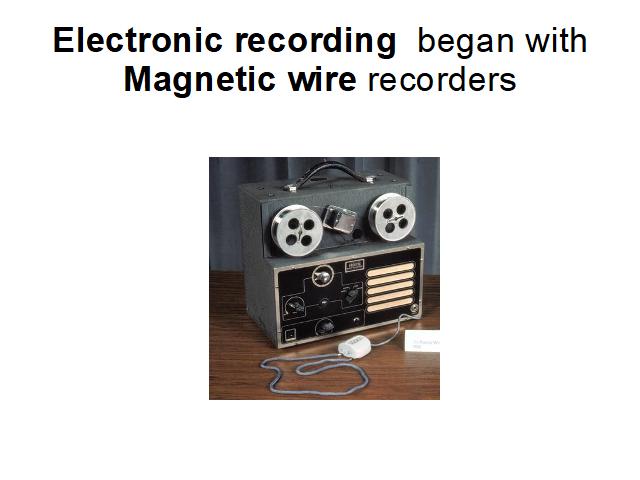
Electronic recording began with Magnetic wire recorders, which were created and used in an office environments for use by executives. A fluctuating magnetic field magnetized the wire as it moved past the recording head. Music was a secondary concern.
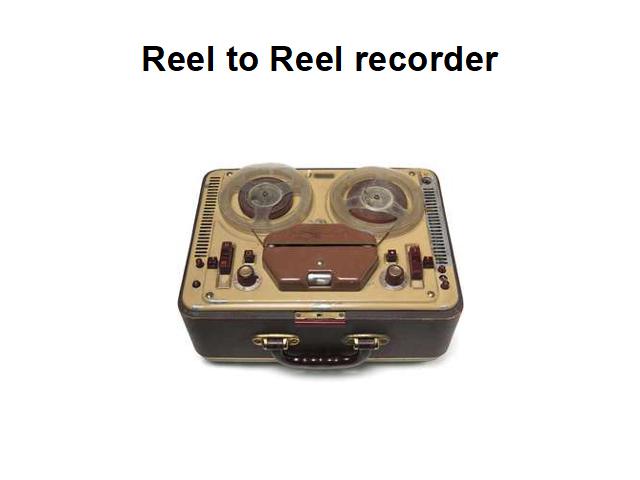
Steel wire was a challenge to use and store, so eventually a long strip of plastic, coated with iron oxide was introduced. Recording tape has been gradually improved since its introduction.
Stereo recording added 2 channels, left and right. This was a vast improvement on the original mono recordings, a path which eventually led to the now abandoned QUAD recordings, and eventually to the 6 channel 5.1 recording format used for DVD now. Other multi channel formats exist.
My favorite is 10.2, marketed as “Twice as good as 5.1!”
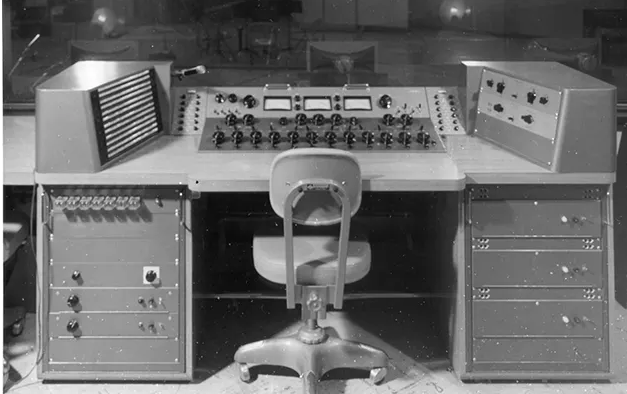
Mixing boards expanded to match the track count of the recorders.Outboard effects such as reverb, delay, compressors, equalizers, and more could easily to used on individual tracks.
This added a LOT of creative control to the musicians and the audio engineers.
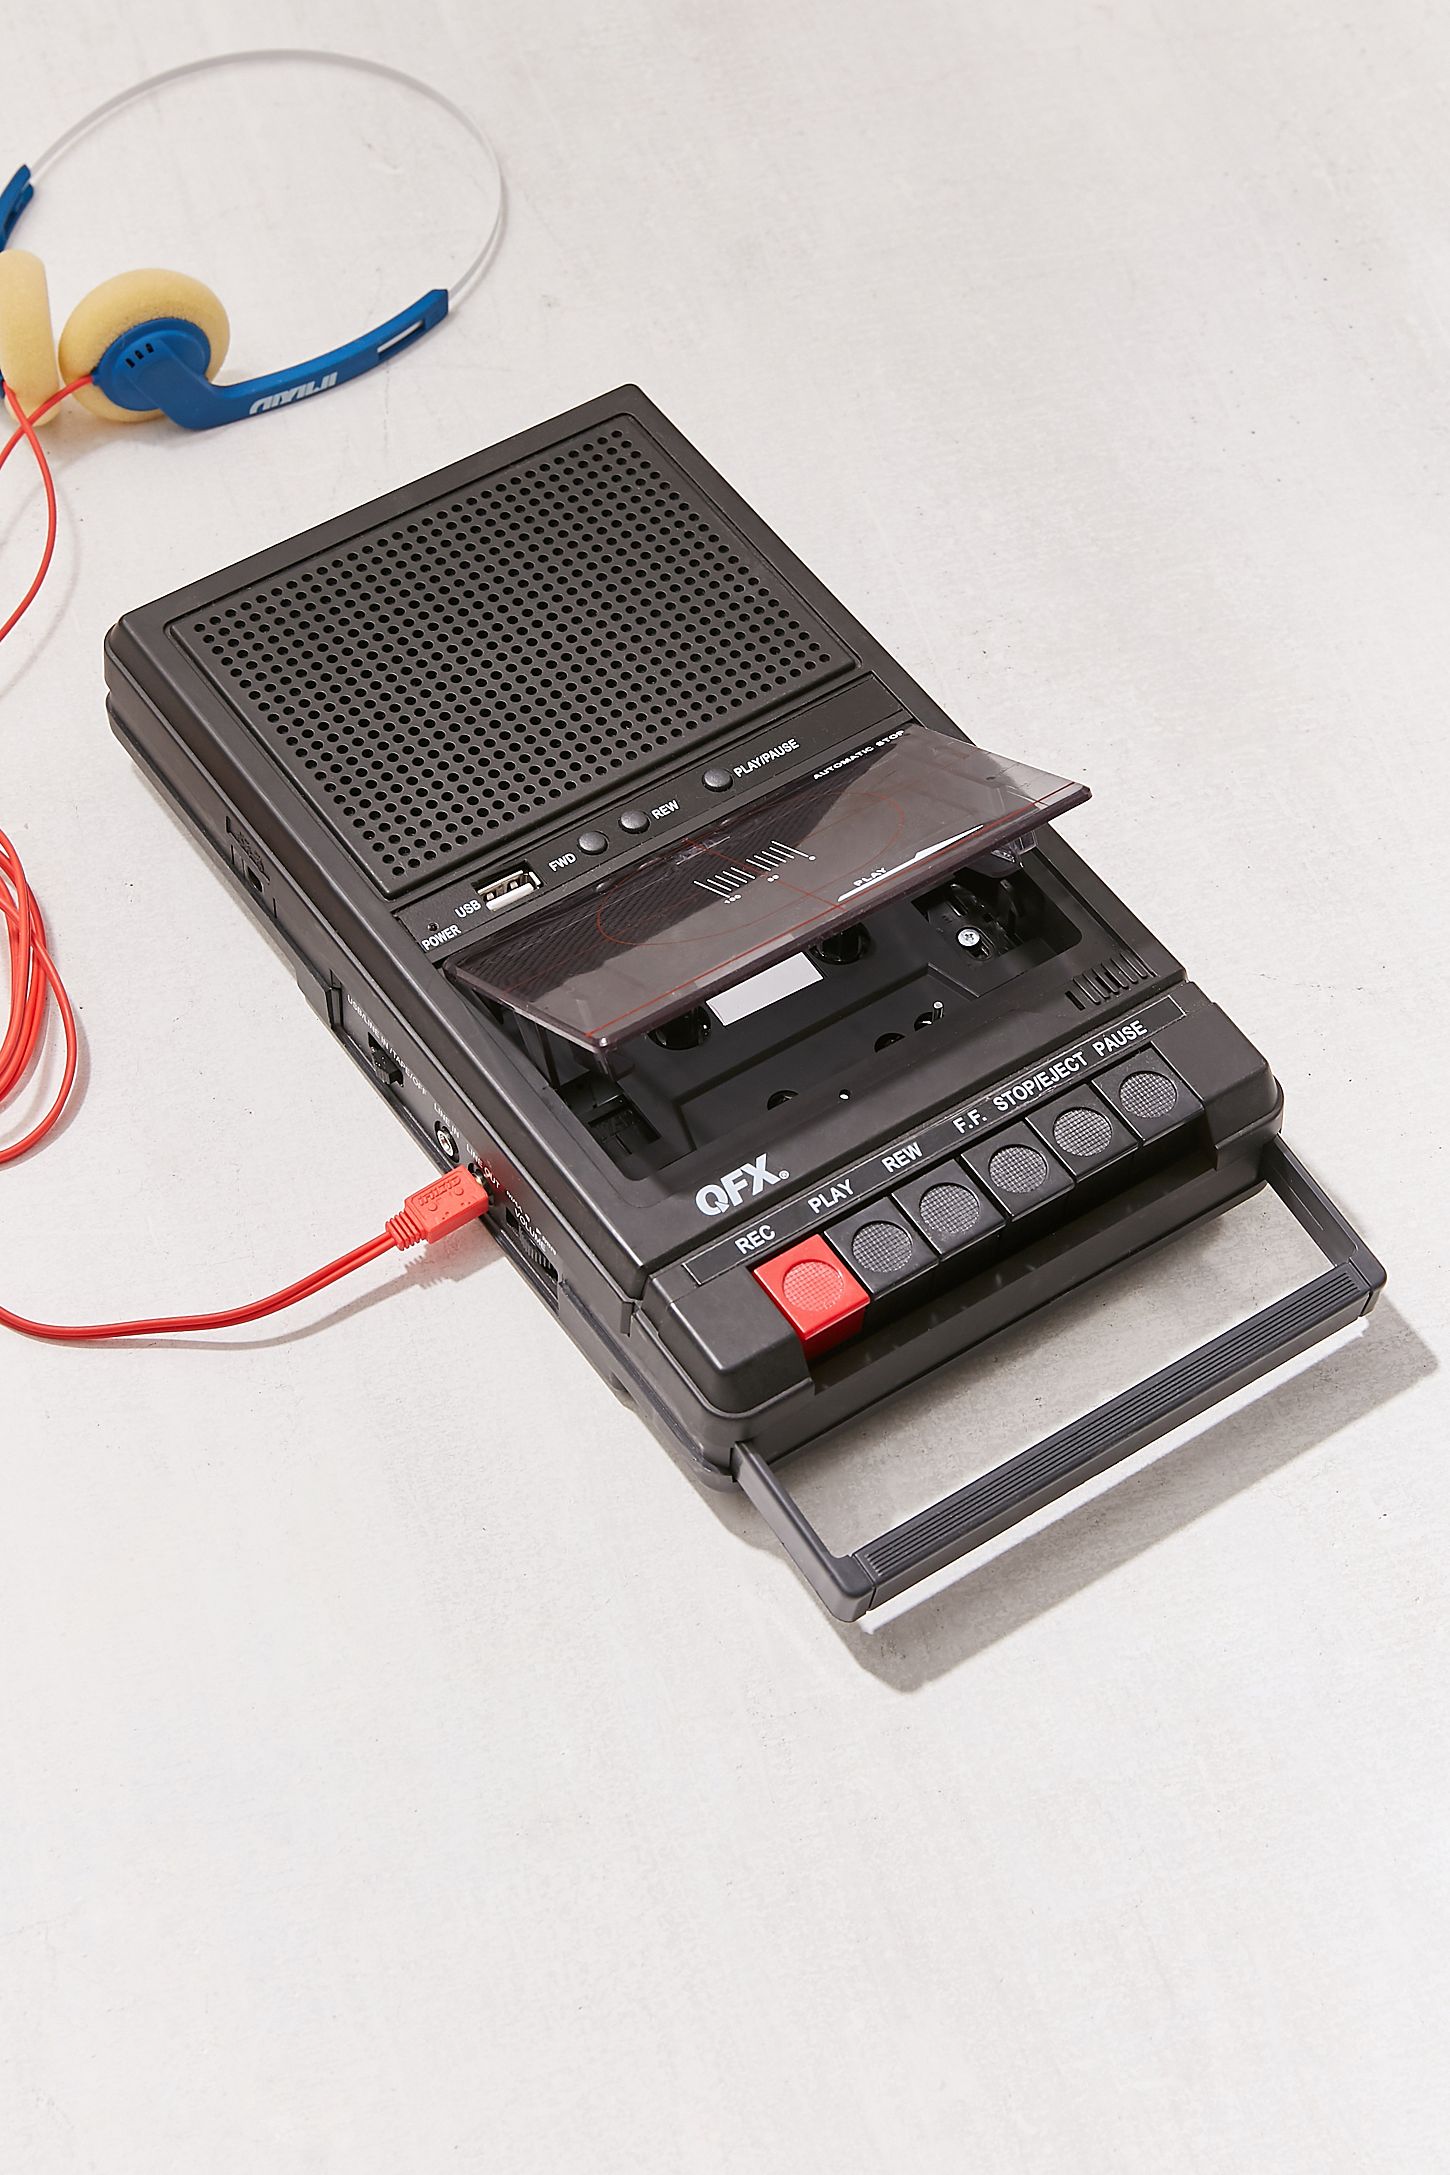
Cassette players gave consumers the ability to record their own music at last, and many a budget minded musician recorded their own performances, or mix tapes of their favorite music.
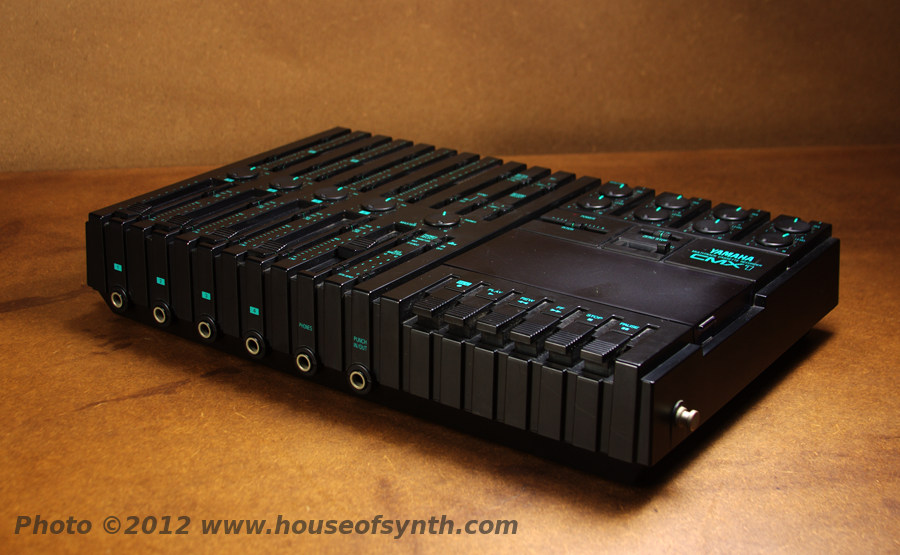
Multi track cassettes added a multi track capability for consumers, although their limited bandwidth made them more of a vehicle for creating demos, to be re-recorded in a “real” studio.
GETTING DIGITAL
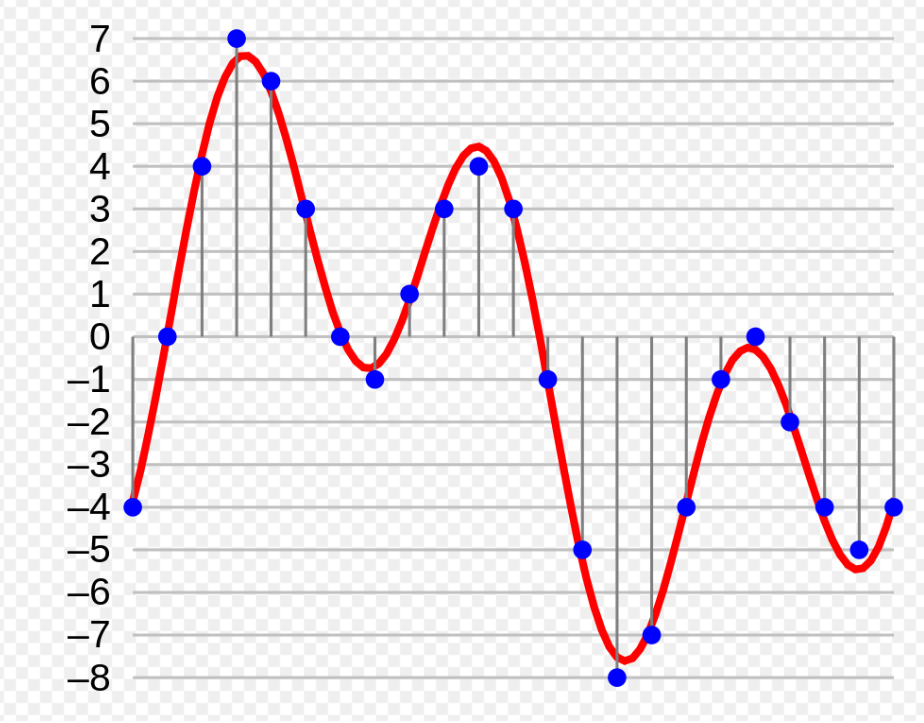
Instead of mechanically recording sound, or recording a fluctuating magnetic field, digital recording slices a sound into thousands of sections and represents each slice with a number.
The bit rate is the number of slices per second. Standard CD audio is sliced into 44.1 thousand numbers per second. This is the bit rate. The range of numbers is the bit depth. CDs have a 16 bit depth, which translates to 65,536 possible values. Generally this standard range is perfectly adequate, and using this standard ensures your music is compatible with most uses. In studios engineers can use higher rates.
An analogue signal (in red) encoded to 4-bit PCM digital samples (in blue); the bit depth is four, so each sample’s amplitude is one of 16 possible values.
A graphic that showed the 44.1 bit rate would have 44,100 vertical lines, and 65,536 horizontal lines. It would be hard to see the audio through the lines, so this graphic is a very simplified visualization.
File formats
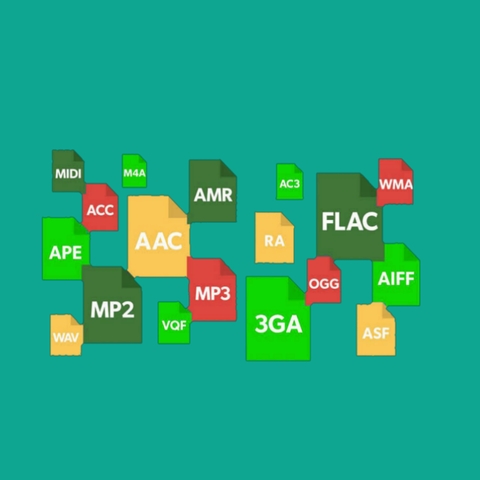
Once audio is recorded it can be saved in a bewildering variety of digital file formats. In addition to various bit rates and depths, audio can be mono, stereo or even multi channel. The file type is always placed at the end of the file name. Its important to know what kind of audio files you will need for your specific purpose.
1. Wave files are very high quality, and end in .WAV.
2. AIF is mostly used for Apple systems, and is a very high quality. AIF files end in .AIF.
3. The Ogg Vorbis format is completely lossless, but partly because of the large files sizes is seldom used. These end in .OGG.
4. MP3 the MP3 format has a reduced bit rate, depth and size. It is considered a “lossly” format, (not lousy!) because it loses some of the higher frequency audio considered by some to unnoticeable. This is still hotly debated. The MP3 format reduces the bit rate and consequently the range of audio, literally throwing away the higher frequencies.
This greatly reduces the size of the MP3 files, allowing larger quantities of audio to be stored on devices, and eases transmission on the internet.
This was more important in the early days of the internet before high speed and larger storage devices were common. Early conversions to MP3 were not of a high quality, giving MP3 a bad name. This has been largely resolved, but I still recommend using a higher quality format for mix down and distribution wherever possible. Youtube, and other distribution mediums reduce the bit rate, so its best to give them a higher resolution to start with, lest the quality suffers.
5. MP4 are used for audio and video together. These end in .MP4.
6. M4V files are MP4 files with added copy protection.
This is the format the files are in when purchased from Apple via iTunes. The file ends in .MV4.
Most of the software I will be talking about ignores this copy protection, but this format generally prevents basic file sharing.
For our purposes, we will be sticking to the 44.1, 16 bit .WAV files.
MIDI
MIDI stands for Musical Instrument Digital Interface and was developed in the 1980s by a group of synthesizer manufacturers so that their equipment could communicate with each other. It uses a special round 5 pin connector or a USB connector.
MIDI stands for Musical Instrument Digital Interface and was developed in the 1980s by a group of synthesizer manufacturers so that their equipment could communicate with each other. It uses a special round 5 pin connector or a USB connector.
With MIDI, pressing a key on one synth can control another synthesizer. A computer using MIDI can control a large number of synths, each playing a different part, making a whole ensemble of musical instruments. If you are not a keyboard player, MIDI is not as much use to you, however it is quite powerful and can vastly expand your sonic palette. Notes can be entered one at a time in the editing mode, so it is not necessary to be a skilled keyboard player to create music with MIDI. Guitar, percussion, woodwind and other MIDI controllers exist.
VERY IMPORTANT: MIDI only records which note is played, when, and how hard the note is struck. After a MIDI sequence is recorded it can be further manipulated, allowing control over playback speed, instrument type, and more.
Let me be clear, and repetitive here: MIDI is NOT actual audio, but information that can be used to control musical instruments, similar to a piece of written music.
MIDI files are literally list of numbers.
Here is a sample of raw MIDI data.
+9120 9120: 90 39 57
(Note A3, played at 42.3.88 with a velocity of 73, held for 2.1.04 and with an off velocity of 64)
To make it even more fun, it is in Hexadecimal, AKA base 16. Don’t worry, the computer handles the tough math!
Fortunately, the software we will be using can display the notes in a MUCH friendlier piano roll or musical notes.
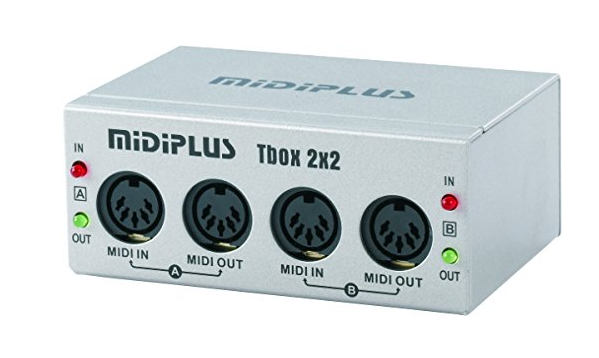

Physically, MIDI uses either the 5 pin round connector shown here, or a USB C connector.
This example shows some MIDI notes in the “Piano Roll” format. It is similar to the old paper rolls in player pianos, the original automated music machines.
The upper of this illustration section shows the notes, and the lower shows the velocity that the notes were struck with.
All these values can be edited further.

You can also view MIDI files as conventional music notation.
There are program to control music notation very precisely such as Sibelius and Logic.

Since it is not audio yet, a MIDI file can be quickly changed to make play a different type of instrument. MIDI modules can have built in keyboards, or be controlled by a separate keyboard. This can save a lot of space!
MIDI is also used to control software synths which are recreations of existing synths, and even creating sound not based on existing sounds at all.
MIDI files can usually be played with a computers built in sounds, although this can be disappointing in the case of stock sound cards. Additional hardware or software can vastly improve the quality of MIDI file sounds.

Section 2: D.A.W – Digital Audio Workstations
A DAW is your software tool for recording. There are lots of choices ranging from free to thousands of dollars. Some of them feature basic video editing also. All record MIDI also.
Protools, Cubase, Logic, Sonar, Garage Band, Reaper, Ableton Live, Fruity Loops, are all very popular. I breifly compare them in this section below.
Garage Band comes pre-installed on most Apple computers. It has a large number of built in instruments and can control external synthesizers.
It is very easy to use, and Apple has regular classes teaching it. FREE (available for Apple only)
Logic is Apple only and is very solid, slightly more challenging than Garage Band, but more powerful. It has a powerful collection of additional instruments and effects. It can be used to control external synthesizers and devices.
$200.
Protools is considered to be the professional standard, very commonly used in high end studios, and can be used with very expensive hardware. They have switched to a subscription based model, and it is currently $300 PER year for the basic version. I used this for years and loved it.
One nice feature is because it is used in the larger studios, a project created in Pro Tools can be taken from studio to studio easily, or from a home studio to a larger studio. There are ways to do this with other software too.
$300 to $1000 PER year.

Fruity Loops, now called FL Studios is often used in hip hop and other beat or pattern based music types. It has a large number of add-ons, and features lifetime upgrades. It is available for Apple or PC. $99 to 449.00

Cubase is very useful, but the basic model is limited in adding in additional instruments and tracks. Add ons are extra.
An introductory version is often included in hardware bundles.
Cubase is for either Apple or PC.
$580 for the base version.
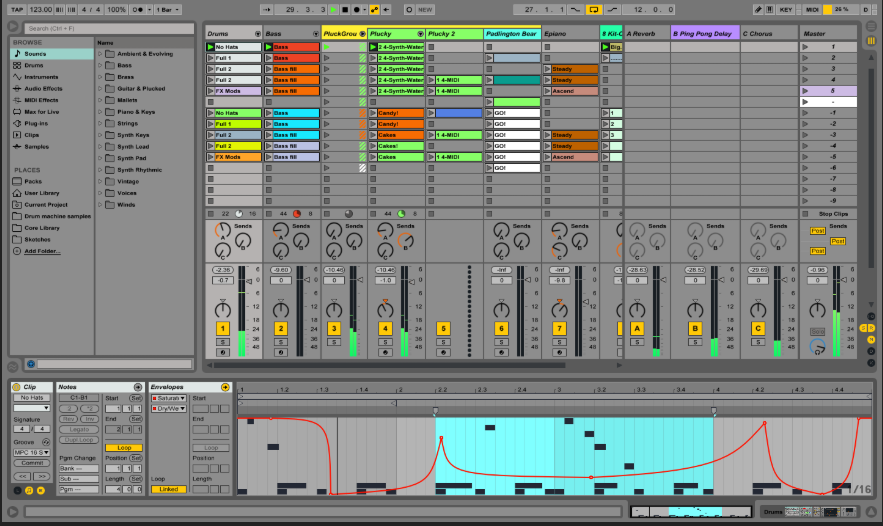
Ableton Live is quite powerful, with support for external instruments, MIDI, software synths and more. It appears to be aimed at loop based composers, but can be used for more traditional recording methods.
Perfect if beat making is your goal.
There is hardware that compliments this software well. The $999 Push has many features.
- 64 expressive pads
- Built-in audio interface
- Intel 11th Gen Core™ i3-1115G4 processor with 8GB of RAM
- Built-in lithium battery with up to 2.5 hours play time
- Built-in 256GB SSD hard drive
- 64 expressive pads
- Built-in audio interface
- Intel 11th Gen Core™ i3-1115G4 processor with 8GB of RAM
- Built-in lithium battery with up to 2.5 hours play time
- Built-in 256GB SSD hard drive
Ableton $99 to $749.
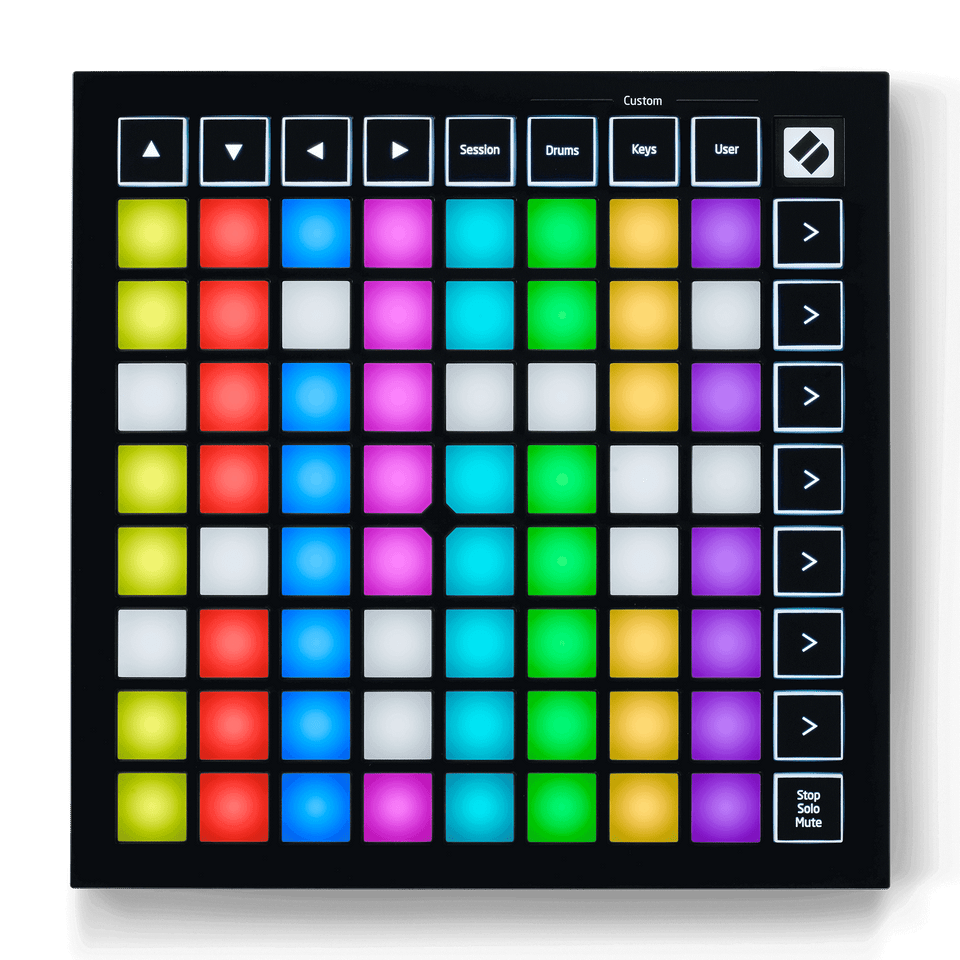
The Novation Launch Pab has colored buttons for starting and stopping events. $94.00. It works well with Ableton Live
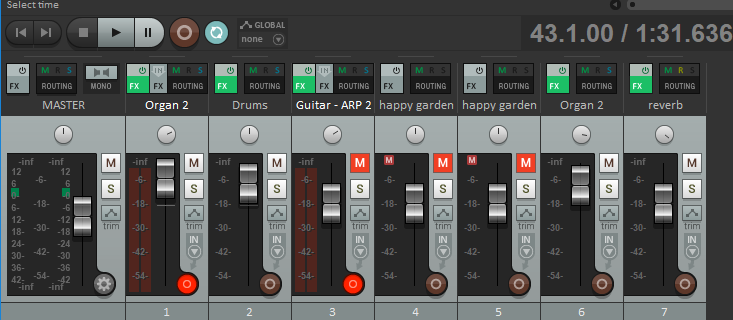
This is my favorite DAW, and it’s purely coincidental that it’s the most inexpensive one! Only $60
I will focus on Reaper in the remaining section, although all of the concepts can be applied to any other DAW. The others can have specific features that might appeal to you more though.
I have included the latest version of Reaper for Mac and PC in the CD, and the links above will take you to the various download sites for the other DAWs.
I especially reccomend Jon Tidey’s very helpful instructional blog,
So many choices! I’ve used most of them, and seen them all improve through the years.
How do you choose one over the other?
Other than the Apple only Garage Band and Logic, all run on either platform.
There are financial, musical and social reasons to choose one over the other. Groups of similarly minded musicians tend to use certain programs. For instance, many hip hop and rap artists choose FL Studio. If you are a techno musician I recommend Ableton for its repetitive loop based work flow. It can, of course, be used to create other kinds of music. Other than that, let your budget and personal opinion decide.
Most have free demo versions limited in one way or another so you can download it and try it out.
FYI: I receive nothing for endorsement.
I LOVE reaper. It does 99% of what Pro Tools did, and I don’t need to synchronise with SMPTE time code and big machinery anymore, so I don’t even need those options.
Reaper has a great media explorer, video editing integration, extensive options for customization, can support many many soft synths and plug-ins simultaniously, and will run on a basic/old computer.
There is a great community for learning and asking questions too.
.
Section 4: Hardware – The Audio Interface
While some audio can be recorded without additional hardware by using the tiny stereo 1/8 inch input connectors built into MOST computers, adding an audio interface dramatically adds to the capability and quality.
Advances in computer speed and storage capacity allow modern systems to record multiple audio sources at once, not possible on the 1/8 connector.
There are 2 main types of audio connectors. Microphones use the XLR type. Guitars and keyboards use ¼ connectors. Some types(shown here) allow both types in one connector.
The basic 2 channel interface allows control over gain, input type, headphones and master volume.
While USB microphones exist, I would not recommend them for any serious work as they tend to be quite noisy and can have latency, introducing an annoying delay into the sound.
2 channel interface
Focusrite Scarlett 2I2 $159

Modern interfaces allow the user to use a single combined connector.
There is an button to choose LINE or XLR. In this case it is marked Inst ( for instrument). If a 1/4 inch instrument cable is plugged in you would choose INST. If an XLR cable, or microphone is plugged in you would NOT have the INST button pushed.
There is also a pad button, to reduce the volume by a fixed amount for certain types of loud instruments.
Some microphones also require “Phantom Power”, which is 48 Volts for the more expensive condenser mics. Here this is labelled MIC 48.
There is an adjustment to accommodate various audio levels, usually labeled Gain. The gain is adjusted to keep the input level as high as possible, but still below the overloading level.


In order to record more than 2 audio signals at once, a multi channel interface is needed.
The connection between the computer and the audio interface is usually USB or Firewire. Older interfaces utilize a card plugged into the computer with special cables.
Even if your interface is only 2 channels, you can still edit and mix more than just 2 channels, once recorded.
The number of channels desired is the main factor affecting price. You will need to consider your work flow & plans. Just how many instruments do you need to record at one time? With multi tracking, you can add more tracks later, building a performance over time.
Better interfaces offer more than just multiple inputs. There are options for fiber optic & digital inputs, multiple outputs for working in surround sound, and MIDI inputs. There can be more control over input volume, and they may even offer features that used to be only on high end mixers such as sending to external equipment, multiple head phone mixes, and more.
What ever type you purchase, install the software supplied with it, or go to the manufacturers site and download the latest version.
PCs often need adjustment with the drivers, the best choice is to use the driver reccomended by the manufacturer.
As an example, my Focusrite Pro 40 interface has 10 analog inputs and 10 outputs. ADAT / fiber inputs from other equipment can bring this up to 20 inputs and outputs. There is also a digital format called SPDIF.
Each channel has phantom power, gain, and LED meters. I use the outputs to send my organ sound to a leslie speaker, the synthesizer to a delay unit, and the master volume to an LED volume indicator, and a power amp. It could also be used to create a surround sound mix or multiple headphone mixs.

Behringer UMC 204 stereo – $130.
2 Midas-designed mic preamps, 24-bit/192kHz resolution.

Focusrite 18i8 $449
Four Focusrite mic/instrument preamps and two instrument inputs are right on the front panel. Eight line inputs, an ADAT input, four analog outs, plus S/PDIF and MIDI I/O.

Behringer U-Phoria UMC1820 USB Audio Interface. $300
18 inputs and 10 outputs. Eight Midas-designed mic pres and high-resolution 24-bit/96kHz converters.
Lynx Aurora (n) 24-TB3 24-channel AD/DA Converter with LM-PRE4 and Thunderbolt 3 Interface. $5,980
The 24-TB3 models provides up to 24-channel recording and playback to microSD for stand-alone operation or confidence recording, as well as two audiophile-grade headphone outs, while a TFT LCD display provides immediate status information.

MIDI Interface
MIDI interfaces use a 5 pin DIN type connector to control older synthesizers. More modern keyboards use the USB interface type. Some have both, but only as a convenience, since only one is used at a time.
Some graphics cards have MIDI built in, needing an additional cable.

I should not leave the section on hardware without mentioning the importance of speakers!
Good headphones are helpful, but try to get some quality studio monitor speakers that have a flat frequency response so that you can get an accurate idea of what your music sounds like.
Inexpensive computer type speakers can seriously mislead you, as can the typical living room speakers.
I reccomend studio monitors of some kind.
COMPUTER
The computer needed for all this work does not have to be that powerful. I’ve used a Mac Mini for years, and also a Mac Air, both fairly low powered. Low end PC laptops can work also, but not a Chrome book or other internet based system. Since the demo is free, go ahead and install it and see.
The main limiting factor in the amount of audio you can record and play at once is the computers CPU power and memory.
I also recommended an external, or separate, dedicated hard drive. Audio files can be quite large.
Recording onto the same drive as the operating system can cause problems. Always be sure you have researched the interfaces compatibility with your specific system before purchase. Systems can evolve quickly, buying older equipment, while inexpensive, can leave you with obsolete or hard to update equipment.
PLUG INS
Plug ins are now used frequently instead of external devices for manipulating audio. Reverb, delay, compression, equalization and much more can be applied to individual tracks. They can even be combined and arranged to affect each other as needed.
Previously synthesizers and external devices were exclusively hardware based, and there are many fine examples. Recent improvements in computer performance have made it possible to emulate hardware synths entirely in software.
These are usually called plug-ins, or VSTs, after the file names. They range from free to thousands of dollars. Some entirely create the audio from scratch, and some use samples triggered by the software.
Here are some locations for free & inexpensive VSTs
https://www.kvraudio.com
http://www.goldbaby.co.nz/freestuff.html
https://onesmallclue.com/plugin/poise/
There are also majestic sounding (and very expensive) VSTs that produce incredible sounds, such as the Native Instrument series.
https://www.native-instruments.com/en/products/
Arturia makes amazing software synthesizers and good hardware too.
VSTs are usually installed in this location on PCs:
C:\Program Files (x86)\VstPlugins
And in this location on Apple computers:
users/Library/Audio/Plug-Ins
Section 5: Introducing REAPER
Reaper is very inexpensive, only $60.00. It can be used for no charge until you have the cash. There is a “nag” notice that reminds you just how long you have been using the software when it is started. Other than that, there is no crippling of any kind. I feel this is an excellent way to try something out, and want to commend the company that created and distributes Reaper.
It is updated regularly.
Download it here: https://reaper.fm
Reaper is very easy to customize. In the view drop down selector, you can select between many options. The windows can be stretched out as needed. On the Reaper site you can get themes to make it look various ways and to augment its functions. Colors and track sizes can easily be changed.
The docker, mixer, and media explorer are what I usually use. The docker and mixer are 2 ways of viewing the same standard controls of volume, panning, transport control and input controls.
As is standard in DAWs, there are buttons for MUTE marked (M), and SOLO marked (S).
MUTE silences that track only. SOLO plays only that track. However, you can also SOLO or SOLO several tracks at once! This is very useful when mixing to isolate sounds


This area has icons for creating new projects, saving, undo and redo.
There is a metronome, an option for displaying a grid, and having the audio “snap” to that grid.
Don’t know what a certain button does? Hover your mouse above it for a helpful explanation. That can be turned off when you have learned it.
This is the Media Explorer, handy for instantly listening to and adding audio to your track, and a Clock showing your choice of bars and beats, or minutes and seconds.

Section 6: Recording with Reaper

The first step should always be to create a new project, create a folder, and save the project into your new folder.
Recording without this step can place files all over the place as Reaper saves the recorded audio, probably on the desktop.
This is messy, and makes it difficult in many ways. Start and stay organized!
The second important step is selecting the tempo for your music. You can change this later, but it’s helpful to do it early.
Turn on the metronome by clicking the icon of a metronome, It looks like a triangle in the middle of this row and then set the music’s tempo. This will assist in editing later on. Tempo can be changed mid-song too.

Tempo is in the lower center of the track window and its measured in BPM, or Beats Per Minute.
Don’t confuse it with the RATE adjustment, which is just to the right of the BPM indicator.
Trust me, you won’t want to touch the RATE control.
After that, follow these steps.
- Track/insert new track
- On the newly created track, choose input type (MIDI or audio)
- Arm recording on the track
- Choose record monitoring to be ON
- adjust gain on audio interface
- Click record in the transport area.

Hold up!
Thats a lot of steps – can you show me each one?
Step 1. Track/insert new track.


Step 2 Under the track name choose input type. This will vary depending on your audio interface & number of inputs. The picture shows stereo input choices – just left and right.
If it is going to be a MIDI track you will choose which one, and which channel. Choose ALL if unsure.
Step 3 Arm recording on the track by clicking the button to the left of the track name section. It will turn RED, to inform you it is actually armed.


Step 4 Toggle record monitoring ON. The symbol is supposed to be a little speaker.
Still step 4: The speaker icon should be dark. If it is light and empty on the left side, record monitoring is OFF. Very subtle…
A handy note appears to let you know its state when you hover the mouse over it.

Step 5. At this point, If you are not playing a MIDI device, while playing your instrument, adjust the gain dial on your audio interface so that it is as high as possible but does not go into overload.
If it does, a red spot appears at the top of the volume section. The audio may be overloading the recorder and the quality might suffer. A small amount for a short time is usually OK, but use your ears.
Digital distortion is unwanted and might permanently mar the recording. You may raise the OUTPUT volume (the silver bars) so you can hear your instrument during your performance, this does not affect the recording volume.
This graphic shows some distortion in the signal, shown as red at the upper section of the volume indicator.
Once you lower the gain, you can click the red part to eliminate the overload warning.
MIDI instruments do not have to have their gain adjusted, as you are not recording actual audio, just data from your keyboard. A yellow bar will appear where the volume is to show you are receiving MIDI.
If you don’t see this, you may have to change your MIDI input source.

Step 6 The record button is to the right of the pause button ( Two vertical lines ). It will turn red when you press it, and recording will start. You should see audio or MIDI beginning the fill the right side.

